
How to Close an Inground Pool for Winter: The Complete Expert Guide
Picture this: It’s early spring, you’re excited to open your pool for the season, and you flip the switch on your pump. Nothing. You check the filter—cracked. The skimmer? Shattered. What should’ve been a simple spring opening just became a $2,000 repair bill.
We’ve seen this scenario play out dozens of times over our 20+ years serving Springfield homeowners. The culprit? Improper pool winterization—or worse, no winterization at all.
Here’s the good news: closing your inground pool for winter doesn’t have to be complicated or intimidating. Whether you’re a first-time pool owner or you’ve been doing this for years, this guide walks you through exactly how we winterize pools for our clients at Accurate Pool and Landscape. We’ll cover every step, share the costly mistakes we fix every spring, and give you the insider tips that only come from two decades in the Missouri pool business.
Let’s make sure your pool survives the winter—and your wallet does too.
When Should You Close Your Inground Pool for Winter?
Timing matters more than most people realize. Close too early, and you’re dealing with algae blooms in warm water with no circulation. Close too late, and you risk freezing damage to your equipment.
The magic number: 65°F. When your water temperature consistently stays below 65°F, it’s time to winterize. At this temperature, algae growth slows dramatically, making your winterizing chemicals effective for the entire off-season.
In the Springfield area, this sweet spot typically hits between mid-September and mid-October. Of course, Missouri weather loves to keep us guessing—we’ve closed pools in early September during cool years and pushed into early November during unseasonably warm falls.
Watch for these signs it’s time:
- Water temperature below 65°F for multiple days
- You haven’t used the pool in two weeks
- Leaves are falling faster than you can skim them
- You’re thinking, “I should really close this thing”
That last one? Trust your gut. We’ve gotten emergency calls from homeowners who waited “just one more week” and woke up to frozen equipment. Emergency winterization costs double our standard rate, and sometimes the damage is already done.
Your Pool Winterization Supply Checklist
Before you start, gather everything you need. Nothing’s worse than getting halfway through the process and realizing you’re missing a critical component.
Chemicals You’ll Need:
- Pool shock (2-3 pounds per 10,000 gallons)
- pH increaser or decreaser
- Alkalinity increaser
- Winterizing algaecide (this is different from regular algaecide—more on that later)
- Pool antifreeze (1-2 gallons)
Essential Equipment:
- Winter pool cover (we’ll talk about choosing the right one)
- Water bags, cover clips, or safety cover anchors
- Skimmer guard (called a “Gizzmo”)
- Winter plugs for return lines
- Air compressor (5+ HP) or strong shop vac
Tools:
- Reliable water test kit
- Pool brush
- Vacuum
- Garden hose
The investment that saves thousands: If you don’t own an air compressor, you have three options: rent one ($40-60/day), buy one ($200-400), or hire a professional. That air compressor is what stands between you and frozen pipes. We’ve replaced over $3,000 in plumbing for one homeowner who tried to skip this step. Your call.

Step-by-Step: How to Close an Inground Pool for Winter
Alright, let’s get into it. This is the exact process we follow when winterizing pools, refined over thousands of closings.
Step 1: Give Your Pool a Deep Clean
Start this 1-2 days before you plan to finish closing. A clean pool is easier to balance chemically and stays cleaner all winter.
Your deep clean checklist:
- Brush every surface—walls, steps, corners, behind ladders
- Vacuum the floor thoroughly (don’t rush this)
- Skim all floating debris
- Scrub the tile line
- Empty skimmer and pump baskets
Pro tip from the field: We always clean before testing water chemistry. Debris sitting on the bottom can throw off your readings, especially pH and alkalinity. Plus, you don’t want leaves decomposing in your pool all winter—that’s a chemistry nightmare waiting for spring.
Step 2: Balance Your Water Chemistry
This step confuses people, so let’s clear it up: you’re not balancing for swimming, you’re balancing to protect your pool surfaces and equipment during months of stagnant water.
Test your water and aim for these targets:
- pH: 7.2-7.6
- Total Alkalinity: 80-120 ppm
- Calcium Hardness: 175-250 ppm
Why these numbers matter: Low pH over winter causes corrosion (etching plaster, pitting metal). High pH causes scaling (crusty buildup that’s brutal to remove). Think of proper balance as insurance for your pool’s finish.
The right order matters:
- Adjust alkalinity first (it anchors your pH)
- Then adjust pH
- Finally adjust calcium hardness
- Run your pump 4-6 hours between adjustments
Don’t rush this. We see homeowners dump everything in at once, then wonder why their chemistry is off. Chemistry doesn’t work that way.
Step 3: Shock Your Pool Hard
Time to nuke anything growing in your water. Use 2-3 times your normal shock amount—this isn’t regular maintenance, this is preparation for months without circulation.
Here’s the process:
- Add shock around the pool perimeter (never through the skimmer)
- Run your pump a minimum of 8 hours—overnight is ideal
- Wait at least 24 hours for chlorine levels to drop below 5 ppm
- Test before moving to the next step
The mistake we see most often: Homeowners add winterizing algaecide immediately after shocking. Don’t do this. High chlorine levels neutralize the algaecide, basically flushing money down the drain. Patience saves you cash.
Step 4: Add Winterizing Algaecide
Notice we keep saying “winterizing” algaecide? That’s because regular algaecide will not work.
Regular algaecide breaks down in a few weeks. Winterizing algaecide is specifically formulated to remain stable for months without sunlight or circulation. It’s one of the most common mistakes we see—and one of the easiest to avoid.
Application:
- Follow the bottle directions for your pool size (don’t guess)
- Pour slowly around the pool perimeter
- Run your pump 2-4 hours to circulate
- That’s it—you’re done with chemicals
Every spring, we open pools that look like green swamps because someone saved $15 using regular algaecide. The acid wash to fix it costs $300-500. Buy the right product.
Step 5: Lower Your Water Level (But Not Too Much)
Critical warning: Never drain your pool completely. Ever. For any reason.
We’ve seen pool walls cave in, vinyl liners float up, and entire pool floors crack from being drained. Your pool is designed to have water weight holding it in place. Remove that, and Missouri’s clay soil will move, shift, and destroy your investment.
The right water level depends on your cover type:
- Solid covers: Lower water 12-18 inches below the skimmer
- Mesh covers: Lower water 3-6 inches below the skimmer
- Safety covers: Follow manufacturer specs (usually 3-6 inches)
Why the difference? Solid covers hold rain and snow, so you need room for that water. Mesh covers drain naturally, so you don’t need as much space.
Use your pool pump or a submersible pump to lower water. Don’t just open the main drain—lowering water through your filtration system is cleaner and safer.
Step 6: Drain and Protect Your Equipment
Now we’re getting into the steps that separate the pros from the disasters. Every piece of equipment must be completely drained, or Missouri’s freeze-thaw cycles will destroy it. Different equipment brands have specific winterization requirements. For detailed instructions on Pentair equipment, check Pentair’s winterization guide or consult your manufacturer’s documentation.
Pool Pump:
- Turn off power at the circuit breaker (safety first)
- Remove the drain plugs—usually one on the pump body, one on the strainer housing
- Tilt or flip the pump to drain completely
- Store drain plugs IN the pump basket (you’ll thank yourself in spring)
Why this matters: A cracked pump housing runs $300-600 to replace. It takes 30 seconds to remove drain plugs. We’ve never understood the math on skipping this.
Filter System:
For sand or DE filters:
- Backwash one final time
- Set valve to “Winterize” or between settings
- Open drain cap at the bottom
- Remove pressure gauge
For cartridge filters:
- Remove cartridges
- Rinse thoroughly
- Let them dry completely
- Store indoors (garage or shed)
- Remove filter drain cap
Heater:
- Follow manufacturer drainage instructions (they vary)
- Most have drain plugs at the bottom
- Some require blowing out with air
- Double-check—heaters are expensive
Salt System or Chlorinator:
- Remove salt cell and bring indoors
- Drain chlorinator housing completely
- Store cell in a safe place (they’re fragile and pricey)
Step 7: Blow Out Your Pool Lines (The Most Critical Step)
If you only do one thing right, make it this one. In 20 years, frozen pipes cause more expensive damage than everything else combined.
You need an air compressor—there’s no way around it. Minimum 5 HP, ideally more. A shop vac might work for above-ground pools, but for inground pools with deeper lines, you need real pressure.
The process for each line:
- Remove the return fitting (eyeball or directional fitting)
- Thread in a blow-out adapter or hold the hose firmly
- Turn on the compressor
- Watch the water blast out (stand clear!)
- When you see mostly air and mist, it’s clear
- Immediately install a winter plug while air pressure is on
- Release pressure
Do this for every line:
- Each skimmer line
- Each return line
- Main drain line (if you have one)
Safety warning: Never exceed 15 PSI. You’re clearing water, not testing plumbing strength. We’ve seen cracked pipes from overpressure.
Pro technique: Always blow from the equipment pad toward the pool. This pushes water out the pool side where you can see it’s working. Blowing from the pool toward equipment can push water into places it shouldn’t go.
The most common question: “How do I know the line is really clear?” You’ll see bubbles in the pool when air reaches the end. Once you see consistent bubbles, give it another 30 seconds, then plug immediately.
This step alone prevents 80% of the spring repair calls we get.
Step 8: Protect Your Skimmer
Missouri winters are brutal on skimmers. Our freeze-thaw cycles—where it freezes at night and thaws during the day—create constant expansion and contraction. Skimmers can’t handle it without protection.
Install a Gizzmo (skimmer guard):
- Screw it into the threaded hole at the bottom of your skimmer
- Tighten firmly but don’t strip it
- The Gizzmo is designed to absorb ice expansion and crack instead of your skimmer
Why this matters: Replacing a cracked skimmer runs $400-800 including labor. A Gizzmo costs $5-10 and takes 2 minutes to install. We replace multiple skimmers every spring for homeowners who skipped this step.
Alternative method: If you can’t use a Gizzmo, pour antifreeze into the skimmer after blowing the line (see next step).
Step 9: Add Pool Antifreeze (As Backup Insurance)
Let’s be clear: antifreeze is not a replacement for blowing out lines. It’s backup insurance for any water you couldn’t fully remove.
Use pool-specific or RV antifreeze—never automotive antifreeze, which is toxic. You’ll need 1-2 gallons total.
Where to add it:
- Pour 1 gallon into skimmer lines (divided among all skimmers)
- Pour remaining antifreeze into return lines if you’re not 100% confident they’re clear
- Pour some into the main drain line if applicable
The antifreeze mixes with any remaining water and lowers the freezing point. Again, this is backup. Blow those lines properly.
Step 10: Install Your Winter Cover
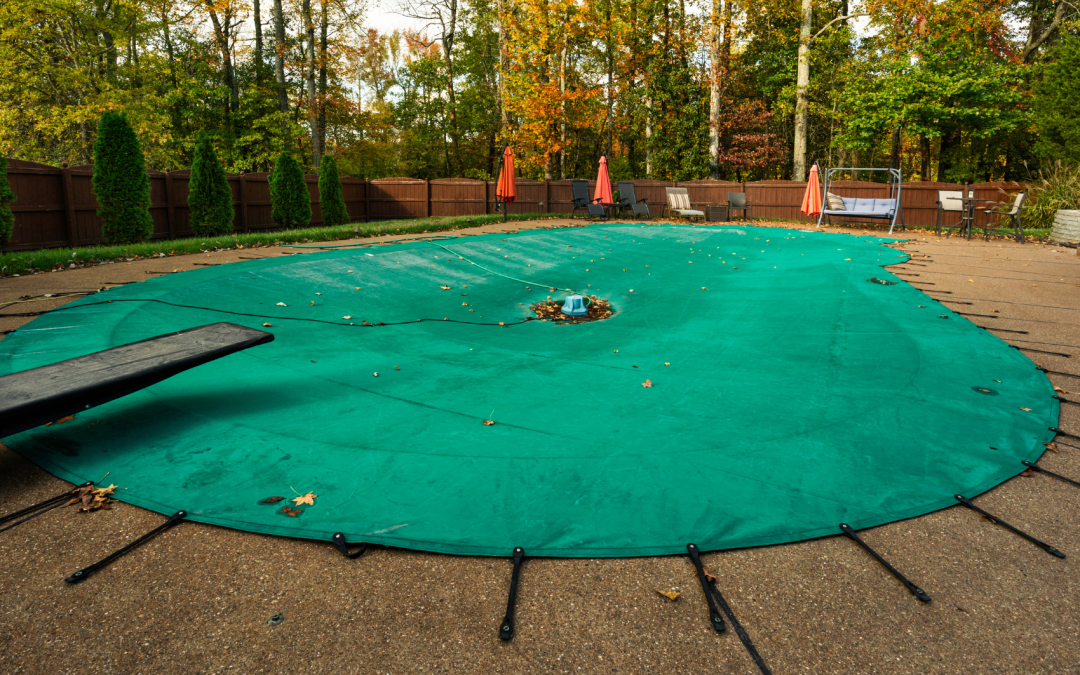
You’re in the home stretch. A properly installed cover prevents debris, protects water chemistry, provides safety, and makes spring opening infinitely easier.
Cover installation 101:
- Clean your cover if you’re reusing last year’s (hose it down, let it dry)
- Center the cover over the pool with equal overhang on all sides
- Secure based on your cover type:
For water tube covers:
- Fill water bags 3/4 full (not completely—frozen water expands)
- Space bags every 3-4 feet around the perimeter
- Overlap bag ends for continuous weight
- Place extra bags at corners
For safety covers:
- Hook springs to all deck anchors
- Work across from each other (like tightening lug nuts)
- All springs should have equal tension
- No sagging or loose areas
For cable and winch covers:
- Thread cable through grommets
- Tighten winch until cover is taut
- Secure all edges
The covers we replace every year: The ones that weren’t secured properly. Missouri wind will find any weakness. A cover that blows into the pool creates a mess that costs hundreds to clean up, and you might need a new cover anyway.
Make sure there are no gaps where debris can enter and no sagging where water will pool excessively.
Step 11: Store Accessories and Equipment
Don’t forget the finishing touches:
Remove and store:
- Ladders and handrails
- Diving board
- Pool toys and floats
- Automatic pool cleaner
- Thermometers and other accessories
Store chemicals properly:
- Keep in original containers
- Store in a dry location above 32°F following CDC guidelines.
- Keep out of reach of children and pets
- Don’t store different chemicals touching each other
Put drain plugs somewhere you’ll find them. We recommend a labeled ziplock bag taped to your filter or in the pump basket. Every spring, we meet homeowners frantically searching for plugs.

Winter Pool Maintenance: It’s Not Set-and-Forget
Closing your pool doesn’t mean ignoring it until April. Monthly checks prevent problems from becoming disasters.
Your monthly winter checklist:
- Inspect cover for rips, tears, or damage
- Remove standing water from solid covers (use a cover pump)
- Check that cover anchoring is still secure
- Look for animal damage or debris accumulation
- Verify water level hasn’t dropped significantly
After major weather events:
- Remove heavy snow with a soft broom (never a shovel—it’ll tear the cover)
- Check for ice damage around the pool edge
- Inspect cover integrity after wind storms
- Remove any branches or debris
After that 2023 ice storm, we got 40+ calls about cover damage. The homeowners who’d been doing monthly checks caught small problems before they became expensive ones.
When to call us: If you see your cover sagging severely, water level dropping rapidly, or equipment exposed to elements, don’t wait until spring. A mid-winter service call is cheaper than spring repairs.
The Costly Mistakes We Fix Every Spring
Let’s talk about what not to do. These are real scenarios from our service calls.
1. “I skipped the line blow-out—how bad could it be?”
Real story: We replaced $3,200 in underground plumbing for a homeowner who thought antifreeze alone would work. It doesn’t. Frozen pipes crack, connections break, and you don’t discover it until spring when water starts gushing into your yard.
2. “I used regular algaecide—isn’t algaecide just algaecide?”
The homeowner saved $15. The acid wash and chemical rebalance cost $450. Winterizing algaecide has polymers that regular algaecide doesn’t. They’re completely different products.
3. “I forgot about the skimmer.”
Replacing a cracked skimmer: $500-800. Installing a Gizzmo: $7 and 2 minutes. We do this repair constantly.
4. “I left the drain plugs in—I forgot about them.”
Cracked pump housing: $400. Cracked filter tank: $300-600. New heater heat exchanger: $800-1,500. Those little drain plugs are critical.
5. “I closed in November—it wasn’t that cold yet.”
Emergency call: $500 just to come out. Equipment already frozen: varies, but usually $1,000+. Close before the first freeze, not after.
6. “I lowered the water too much.”
Vinyl liner floated out of track: $200 minimum to reset, often more. In extreme cases, the liner tears and needs replacement: $3,000-6,000. Keep water in your pool.
7. “I secured the cover with bricks and rocks.”
Cover blew into the pool during a windstorm. Removal and cleaning: $300. New cover: $400-1,000. Use proper anchoring systems.
We’re not trying to scare you—we’re trying to save you money and stress. Every one of these mistakes is completely preventable.
DIY vs. Professional Winterization: What Makes Sense for You?
Look, we’re in the business of winterizing pools. But we’re also honest about when DIY makes sense.
DIY is a good choice if:
- You own or can borrow an air compressor (this is the deal-breaker)
- You’ve successfully winterized before
- You’re comfortable with pool equipment
- You have 4-6 hours to dedicate to the process
- You enjoy hands-on projects
Call Accurate Pool and Landscape if:
- You’re a first-time pool owner
- You don’t own an air compressor
- You have a complex pool system (multiple pumps, water features, spillovers)
- Time is tight
- Peace of mind is worth the investment
- You’d rather spend Saturday doing literally anything else
The honest cost comparison:
DIY costs:
- Chemicals: $80-120
- Cover (if replacing): $200-1,000
- Equipment (if you don’t have it): $250-500
- Your time: 4-6 hours
- Risk of mistakes: Potentially $500-3,000+ in repairs
Professional service:
- Our complete winterization: $250-400 (depending on pool size)
- Time: 2-3 hours, but it’s our time, not yours
- Risk: None—we’re insured and experienced
- Spring discount: Often included
What our winterization includes:
- Complete water testing and balancing
- Professional chemical application
- Equipment drainage and winterization
- Proper line blow-out with professional equipment
- Cover installation and securing
- Equipment inspection (we’ll flag problems before they become emergencies)
- Spring opening consultation
The local advantage: We’re here in Springfield. If something goes wrong mid-winter, we can be there. If you have questions in January, call us. That relationship matters.
Frequently Asked Questions
What temperature should I close my pool for winter?
Close your inground pool when water temperatures consistently stay below 65°F. In the Springfield, Missouri area, this typically occurs between mid-September and mid-October. Closing too early while temperatures are still warm can lead to algae growth, while closing too late risks equipment freezing.
How long does it take to winterize an inground pool?
Plan on 4-6 hours for a complete DIY winterization. This includes cleaning, balancing chemicals, draining equipment, blowing out lines, and installing the cover. Professional services typically complete the job in 2-3 hours due to experience and proper equipment.
Do I need to drain my inground pool for winter?
Never drain your inground pool completely for winter. Lower the water level 3-18 inches below the skimmer (depending on cover type), but maintaining water weight is essential to prevent structural damage, especially in Missouri’s freeze-thaw climate. Empty pools can crack, shift, or have walls collapse.
What’s the most important step in winterizing a pool?
Blowing out the pool lines is the single most critical step. After 20+ years in the business, frozen and burst pipes cause the most expensive winter damage we see—often $1,000-3,000 in repairs. Use an air compressor to remove all water from plumbing lines and install winter plugs immediately.
Can I use regular algaecide instead of winterizing algaecide?
No. Regular algaecide breaks down quickly and won’t protect your pool for months. Winterizing algaecide is specifically formulated to remain effective throughout winter without sunlight or circulation. Using regular algaecide is one of the most common mistakes that leads to green pools in spring.
How much does professional pool winterization cost?
Professional pool winterization in the Springfield area typically ranges from $200-400 depending on pool size and complexity. Compare this to the $500-3,000 we’ve seen homeowners spend on spring repairs from improper DIY winterization. One cracked pump housing costs more than professional service.
Should I add antifreeze to my pool lines?
Pool antifreeze serves as backup insurance after properly blowing out lines, not as a replacement. Add 1 gallon to skimmer lines and problematic return lines after removing all water with an air compressor. Use only pool-specific or RV antifreeze—never automotive antifreeze, which is toxic.
What happens if I don’t winterize my pool properly?
Improper winterization can result in cracked pipes, broken pump housings, damaged filters, shattered heaters, cracked skimmers, and torn pool covers. We see these repairs every spring, typically costing $500-$3,000+. In severe cases, we’ve seen complete equipment replacement needs exceeding $5,000.
When should I reopen my pool in spring?
Plan to reopen your pool when daytime temperatures consistently reach 70°F, typically late April or early May in Missouri. Opening too early means constantly fighting debris and cold water chemistry, while waiting too long allows algae to establish if your winterizing chemicals have depleted.
Do I need to cover my pool for winter?
Yes, absolutely. A proper winter cover prevents debris accumulation, reduces chemical loss, protects against algae growth, provides safety, and significantly reduces spring opening time and costs. The investment in a quality cover pays for itself in reduced maintenance and faster spring startup.
Protect Your Pool Investment This Winter
Proper winterization isn’t about spending money—it’s about protecting the money you’ve already invested. In 20 years of servicing Springfield pools, we’ve learned that three steps prevent 90% of winter damage: blow out your lines thoroughly, protect your skimmer, and secure your cover properly.
Whether you tackle this project yourself or hand it off to us, the goal is the same: a pool that survives winter and opens beautifully in spring. We’ve been protecting Springfield pools for over two decades, and we’d love to protect yours.
Ready to winterize your pool? Call Accurate Pool and Landscape or schedule your winterization service online. We’re booking fall appointments now, and slots fill quickly as temperatures drop.
Have questions about your specific pool setup? We’re here to help, even if you’re planning to DIY. Give us a call—we’d rather answer questions now than fix preventable damage in spring.
Your pool is ready for summer fun. Let’s make sure it survives the winter to deliver it.